Showing posts with label Size 5 Book. Show all posts

Saturday, September 22, 2012

Project: Red Man

Name: Red Man Book
Size: Size 5, Double Fold
Cover: Leather Cover
Cover Material: Red Leather
Pages: 500 (approximately)
Paper: 75 lb
Elements: None (currently)
Estimated Value: $60.00 


From the 'What Kind of Book do you Want' survey.
What style of book do you want? Double-Fold (two-in-one style book)  
What size of book do you want? Size 5: A book that is 8 1/2 by 11 inches in size. AKA: "Tome" What kind of cover do you want for the book? All-Leather  
What kind of paper do you want for the book Thick-weight paper  
What COLOR of paper do you want for the book? Stained / aged.  
What kind of closure do you want for the book? Two Buckles (Silver) 
Embellishments Pressed cover symbol, Silver book corners (to protect them) 
Briefly describe the book. I would like red leather with the Vitruvian Man as the symbol pressed into the cover. 

***
I'll be contacting the client tonight with an approximate price for the book and see where he'd like to go with the project. 


Update 9.13.12 

After conferring with the client, he's opted to remove the pressed symbol of the Vitruvian Man and remove the silver book corners.
This leaves the book as:

Size 5 Double-Fold book with stained-pages and a red-leather cover.

Totally doable. :)

Estimated price on the book: 50.00 (DF) + 5-10.00 (Red Leather)=60.00

Project: Green Knot

Name: Green Knot
Size: Size 5, Double Fold
Cover: Leather Cover
Cover Material: Black Leather
Pages: 600 (approximately)
Paper: 75 lb
Elements: Four book ribbons, raised symbol
Estimated Value: $50.00

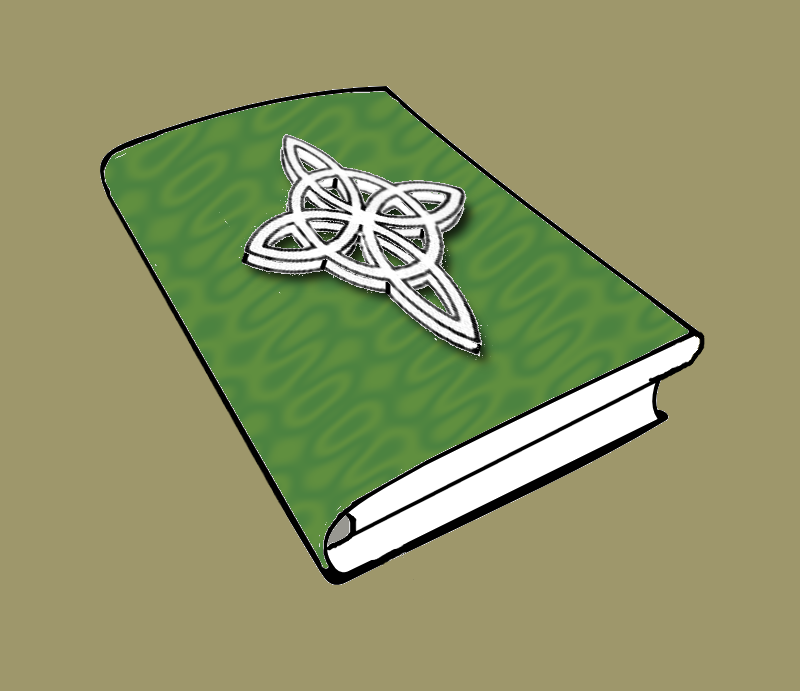
Description: A size 5, double-fold journal with a depressed design of a witches knot on the outer cover.


Update (5.29.12) Additional greyboard has been found for the project and is being shipped to me. Should have it in hand in a few days and then I can start the carving for the symbol.


Discussion: 
Finding a good copy of a witches knot wasn't that hard (thank you Google images).


So here's what the book would look like as a mock-up of the raised design and the cover. (I omitted the 4 ribbons)

The raised image of the knot was left white for the image above but in the final project it will be under the leather. I just have no idea how to make it look that way with Gimp.

9.21.12

Now that I have the boards taped up and ready for the leather the question was raised as to what version of green to dye the leather. I'm going to experiment tomorrow with some various shades to come up with a few versions of a good 'green' for the client and let the client pick.
The cover boards with spines all taped out and ready for the leather.

Friday, September 21, 2012

Book: Chinese Copper

When I experiment with a technique it doesn't always work out for the best. Sometimes the process, the materials or even the idea is just so wonky that it doesn't want to work out. So when I get an idea to experiment with some new aspect of binding I usually fall back to the trusty composition notebook. Yes, those cardboard-covered notebooks that you can get from the dollar store make excellent test subjects.

Take this recent experiment with the concept of a 'Triple Fold'.  I have made Double Fold books several times and I have been asked if I could ever make a book with three sections. Since I wasn't sure how it would work - or if people would actually want a book with three different sections to it, I decided to give it a go.

The three books are bound one to each other in a long, continuous section so that the inner-most book is hidden within the second book which is then turned inward against the first. Structurally this allows the author to divide their subjects into three separate areas of focus. It could be daily notations, experimental notes and then formulas, for example.

The cover was created by covering the whole book in a layer of brown, kraft paper to give it a single, uniform 'skin'. The skin was then given a coat of green paint to kill the dullness of the natural kraft paper. Once dried I added yellows and browns with sponge painting and then added some copper highlights. I then added some raised elements on the front cover and sunk-in some Chinese-looking scrap booking embellishments to complete the look. The disk item in the center swivels to reveal an open space below where one might put a photo or some other type of decoration unique to the author. The book has no closure because I couldn't think of one that would go with the design. Estimated value: 10-20 dollars.

Thursday, September 20, 2012

New Technique: Laminate Paper Cover

Since most of my experiments use cheap, composition notebooks I don't worry about completely wasting the materials involved. I try and use the cheapest materials to see if the idea will work first and then, once the theory has been proven, try it with better quality materials.

A new technique in creating covers occurred to me and I wanted to try it out. The technique involves covering the boards of the book with multiple layers of thin paper, building it up with washes of glue to fill in the nooks and crannies. The idea, shown right, creates folds and imperfections in the cover which I think add to the overall look. The more of those folds and things the better.

I didn't go crazy with the folds but I could have spent an hour crimping and roughing the paper to make the new texture more pronounced.

 Once I had two layers down and let it dry for a while, I came back and started adding paint to cover over the original material and so that the composition cover couldn't be seen through it.

I will be going over the black layer with lighter and lighter shades of paint to highlight the folds and new texture of the cover.

Pics to follow.
The first layer of black paint to give it a good base.
Sponge-painted, the cover starts to look less like composition notebooks and more like a real book.

 Once I had the book painted and sealed with a layer of pva (polyvinyl acetate) I wanted to add a closure to it. Unfortunately the only ribbon I had was blue but I don't think it looks too bad.

The cover is set with a raised 'picture window' where the author could place a title or subject card to tell what the contents of the book were.

As this was an experimental book I didn't get too fancy with the shape of the title box but it doesn't look too bad; almost like an old lab manual. 

Friday, October 28, 2011

BOOK: Wedding Album


This is a wedding album I made for some friends using a variety of techniques. This was mostly an experimental project as they weren't too specific about what they wanted so I tried a few new ideas.

1. The idea of creating a 'window' for a photograph at the front of the book had gotten my attention a while back but the design element practically screams "photo album". I created the raised border using grey-board and added a layer of thin, brown paper over it to remove some of the 'seams'.

2. I used a Half-Cover bind with leather corners and spine since I was running out of leather.

3. I wanted to try a 'window in a window' or 'border inside of a border' design element where the outside of the book has a raised border and then another border set inside the edge. I think it really brings some interesting design elements to the cover of the book but will have to fiddle with how I use it on future projects.

Thursday, June 23, 2011

BOOK: Triangular Book

This book is a modified Size 5 book that has had the sides cut down to create an equilateral triangle for the cover.

So the spine of the book is a full eleven inches (10.5 for the block) and the width at the middle is nine inches (8.5 for the block).

The book was done for a client out of Norway who wanted an 'unusual book' with a triquetra recessed into the cover. This is actually the second of two triangle books that I did. This version had no closures (at the client's request) and the second had no cover design but two snap closures located midway along the two angled sides.

The second book was given to the prop company who did the work for Stargate: SG1. There was a call on one of my bookbinder forums where the prop company needed a 'bunch' of handmade books but did not have the budget to buy them from a prop maker. So the head prop guy put the word out that he would accept any donations and send all of the binders back a letter of acceptance and appreciation. Basically it was a way for binding geeks who were also into SCI-FI to get their hobby on film.

So I thought that a triangular book would catch their attention. Sure enough - if you look real carefully in the background of Episode 11, Season 3 (Past and Present) where you see a pile of books and notebooks you'll see the triangular edge of my book. Granted you have to be looking for it but when I saw it I gave a not-so-silent Whoot-Whoot!

So to show off what the inside of the book would look like if you used it for actually writing, a good friend of mine took one of the blank pages I had cut out but did not use and threw in some basic illustration and text to show off the alignment.