Showing posts with label Design. Show all posts

Tuesday, May 21, 2013

Design: Pentagonal Book


The pentagonal book was an idea that I've had since I did the Triangular Book a few years ago. It took me a while to figure out how to construct the book-blank out of a standard-sized piece of paper. Eventually I ended up cutting it out of a size-5 book so it's somewhere around a size-4 when it's cut down to shape.

Then the problem came up that I have to put a cover on it. Naturally a pentagonal book would need a pentagonal cover. Well, this seems like a very pagan-focused book so I thought about putting a pentagram (since a pentacle has a circle around it) of... something.

I'm not sure if it's metal bars or sticks or what. I'm also not sure of the cover material: either natural leather or black.

Then I have to figure out how the book is closed if at all.

So...Details:

I need to find what the five main points would be. Perhaps gem stones of some kind.
Then I need to find out the five inner points. These could be upholstery tacks like from Tandy Leather.
Then I need something to connect the points together. Plate Aluminum? Something silvery-ish.

Still working on the concept.

Monday, May 20, 2013

Leather Stamping


To continue my recent foray into all-leather covers, I've been working with some leather stamps.

Usually I would employ leather stamps to decorate a book's border. It's a fairly simple way of adding design to the book without having to spend hours hand-pressing the design by hand.

 This stamp (the thing that looks like a pawn from chess) can easily be used to create what I would call a 'tulip' design for a border.
 The same design can be used to wrap around the book with something at the corner (as shown above) or left open (below) for a different stamp (perhaps something round)


There's also a fairly simple stamp that I ran across that would seem to be perfect for most of my covers.
The 'X' can be repeated over and over again to almost create the "Tripple Moon" symbol commonly associated with Goddess worship - or it could just be a simple, two-strand twist for a book's border.

Update 5.20.13


This pattern of alternating oak leaves is made from one of Tandy's Leather Stamps. Click here for the Right-facing and here for the Left.

Monday, September 17, 2012

PROJECT: Tree of Life

Update: 9.17.12

The Tree of Life basic shape is still an idea for a simple book. I may try and cut out the shape of the tree and try it as a raised image to see how it would look covered in paper rather than in leather.


Original Post: 7.15.11

For one of the next books that I'm making, I wanted to try a new design for the front cover. The book is going to be a Double-Fold, size 5, book with a section of white pages for the main book and black pages for the interior, or secondary book.

The front cover will have a raised element of a tree-of-life with the hollow sections revealing either glass or some kind of 'glossy' material. I'm not sure if the sub-surface color will be black, white or green but I sketched up some ideas (right) to see what it would look like.

I really liked how numbers 1 and 4 turned out because it left a lot of empty space that I can use to show off the tree design that's raised. Number 1 is very stylistic and you have know that you're looking at a tree to realize what the design is (in my opinion). Number four has a lot of the 'tree' qualities that I'm looking for in the design and there's no mistaking it for some other shape when it's raised off the front of the book's cover.

The problem is that it's asymmetrical and I generally like my books to look 'balanced'. Additionally, the thin 'branches' on the side would probably not stand up to the wear and tear that most of my books are put through so I would need to fatten them up for a finished design.

Since I wanted to keep the design from #4 but add some thickness to the branches, I took concept and re-drew it and then mirrored it so that it would be symmetrical. The shaded areas would easily show the green or black backing material that I had in mind although I might thin down the top of the trunk a little.

Additionally, the surrounding 'ring' of the tree design will be given an added later to bring it out as a design element on the cover and I need to stretch the design of the tree to make it more ovoid than a flat-circle. So I needed to scan in the image and play with it in Gimp a bit to figure out what kind of variations I could try with the colors and design.

Once I had plenty of variations with the color of the tree, background and possible cover I couldn't decide on what version I liked better so I put them together in a concept-design video. I had been meaning to implement this on some of the bigger projects, documenting the whole process by which a book was created so that future clients could see the design process as well as what types of elements were possible.

Design: Stag-Tree


This is a combination design using the "Black Stag" head as well as a modified "Tree of Life" design.

Design: Black Stag Head

A new cover design idea for either a hard-cover or leather-covered book. I'm thinking that the design, burned or pressed into leather with a green background would look awesome.


Update 9.17.12

I think that the design would be perfect as an image burned into the surface of a leather book. I'll probably paint or stain the design to make the negative image pop off the cover. 

Tuesday, June 12, 2012

Design: Owl Spine


I've always wondered about adding a design to a book that wrapped around the entire cover. I remember seeing some journal cover a while back that had a large Celtic tree that was centered along the spine. I thought that I could do the same thing.

 The cross-hatching in the background would require a fine-bladed wood burning tool to keep it from looking too 'mushed' I would think.

To wrap around a journal of dyed pages of mixed colors (green and brown) I thought about making an Autumn-themed book and I wanted to include my new 'spine-animal' design.
I would probably use a tie-closure for this design.


Design: Serpent-Cup

Over and over again I am trying to add symbols for book-cover designs. I think the above design was made years ago and I've still not put it on a book.

The symbolic elements are:

Snakes entertwined: Snake = Rebirth, Regrowth. Knotted = Bound, connected, etc.

Cup = Female. Life. (Holy Grail-ish), Plenty, etc.

Sun/Moon = Balance between male and female.

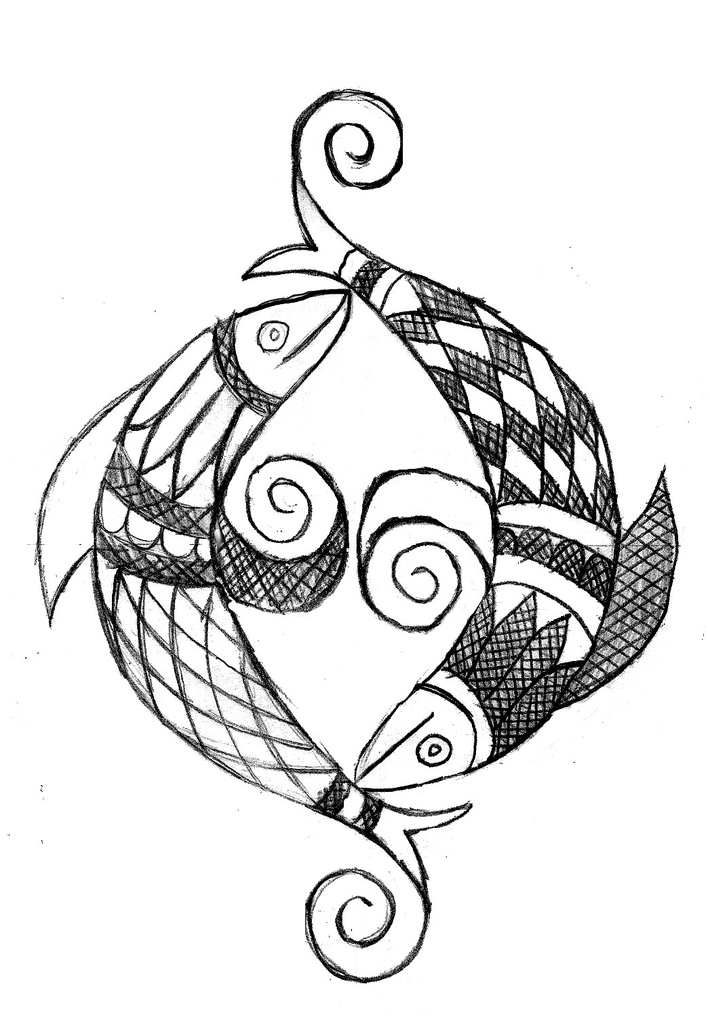
Design: Fish Yang


A friend of mine once asked if I could make a yin-yang symbol out of fishes. Don't ask - it's complicated.

I think this design would be great as presswork into a leather journal using additional dye to bring out the darker portions.


Update: 5/13/13
This design was put on a ledger-sized, all-leather book cover. (Click Here)

Design: Moon Wheel


This is a design that I've done over and over again as a possible cover for a book. I think that I would either press the design into the leather and then color it with dye to bring out the lines and different phases of the moon.

The only problem with the design is that it really needs something at its center. I could always put in a tripple-moon or a pentacle or something depending on what the client wants.

Saturday, May 26, 2012

Wicker Tree Symbol


 So I was  at Walmart and saw a DVD title that caught my attention: The Wicker Tree. It is the sequel to the original Wicker Man movie back in the 1970's with Christopher Lee. The symbol on the front of the DVD cover caught my attention as an interesting combination of the sun-and-face design along with a pentacle.


So I decided to do a search for the image and found something that I could start with. I didn't want to use their versions because it's full of inverted crosses and that's hard to do as background filler in presswork for a leather journal.

I sketched out half of the design (since I would simply duplicate that half to make the whole) and scanned it in. When I combined the two halves together it made a weird... crown-ish design at the top. The wavey sun-rays should spiral around the sun in the same direction (and I planned on fixing that) but the image with the central 'crown' thing just looked interesting.


But I still wanted to see what the image looked like with the radial sun-bursts going in the right direction so I fixed it and decided to add some color for the wavy lines. In the finished design for the book, I'll simply press the entire shaded area and dye it darker.
But - since the book would not be white I wanted to see what the black on stained-leather would look like and knocked together a quick representation of the different looks.


I'll post finished progress pics once I start working on it.

Monday, January 23, 2012

PROJECT: Orville Wright's Diary

DIMENSIONS: 3.5 x 8
COVER: Cardboard
PAGES: 30


This is Orville Wright's Diary. The diary that he documented the famous, first flight and most of the days leading up to it.

When I ran across it for another project I was interested in its odd dimensions and decided to dig into how it was made.

This style of journal or notebook was an odd-sized because they were designed to fit into the breast pocket of a jacket. Occasionally referred to as a 'Jacket Journal' or 'Pocket Diary' the pages were either lined or graph.

I picked this image of Orville's diary from a wiki page and started counting squares to get an idea of how big it would have been.

Since graph paper usually comes either four squares to the inch or five, I calculated the dimensions based on the larger of the two. On my best guess, the journal is 3.5 inches wide and eight inches long. I would guess that the cover was some form of card stock or thick paper cover. I couldn't find a good picture of the cover but I'm sure there's probably more photographs out there with the Smithsonian.

Based on a closer examination of the spine - the pages are stitched together but it's probably stitched in a block (like a composition notebook) rather than in gathers or choirs.

The pages have been rounded so that they don't get damaged while constantly being stuffed into a jacket pocket.

The pages number up to 58 as far as I've seen. There could be thirty pages (doubled to make 60) or fifty pages (doubled to 100) but it's not certain. Fifty pages would create a journal that's around a quarter inch thick (without covers).

The journal would seem to be a perfect design to capture the notes of the day or whatever important lists that one might have.

I should probably try and make one.

Wednesday, July 6, 2011

TERM: Bookplate

Bookplate v 1.0
The bookplate is something that I've been wanting to create for a while; something that I could use to mark my books. I wanted something that I could easily print out from my home office and use on everything from paperbacks and such. The image of the Hermit from the Rider-Waite that I've altered for my blog and such seemed a logical choice. It's a nice color of green too for the background.

See also:

Bookplates